When cannabis plants simply refuse to grow
It is one of the most frustrating situations for any grower: the seeds have germinated nicely, the first delicate green leaves have unfolded, but then nothing happens for weeks. The seedlings sit frozen in the pot, do not grow taller and do not make new leaves. This phenomenon is called stunted growth.
Before you panic and overload the plants with nutrients, you need to understand how young cannabis plants work physiologically. In the first 1–2 weeks after germination, the plant focuses almost exclusively on building its root system below ground. Only once there is a stable foundation does visible vegetative growth above ground really get going.
If that growth spurt still has not come after 14 days, something in the environment is blocking it. In the juvenile phase, cannabis reacts extremely sensitively to conditions that are not optimal. Go through the following six main causes systematically to find and fix the growth brake in your grow room.
The 6 main causes of stunted growth in detail
1. Too little, too weak or the wrong light
Photosynthesis is the engine of plant growth. Light supplies the energy the plant uses to convert CO₂ and water into sugars and tissue. Young seedlings do not need the intense light of a mature flowering plant, but a shortage of photons stops growth immediately.
- The problem: cheap household LEDs or unsuitable lamps are often used. A distance between grow light and seedling that is too great also means that the light intensity (measured as PPFD – photosynthetic photon flux density) at the canopy is almost zero. The plant starts to "stretch" – it reaches extremely thinly towards the light, eventually falls over and stops producing leaves.
- Guide values for light intensity:
- Seedlings & clones: 100–300 µmol/m²/s PPFD
- Vegetative phase (growth): 300–600 µmol/m²/s PPFD
- Flowering phase: 600–900+ µmol/m²/s PPFD
- The solution: invest in a good LED grow light with a spectrum optimised for growth (lots of blue). Hang the lamp according to the manufacturer's instructions (details in the guide Hanging grow lights & PAR values). Use a free smartphone app (such as "Photone" with a calibrated diffuser) or a lux meter to roughly measure the intensity at the tops. Keep a stable 18/6 light schedule.
2. Overwatering (the most common beginner's mistake)
Plants need water to survive – every grower knows that. But besides water, cannabis roots above all need one thing: oxygen. If the root zone is constantly waterlogged, anoxia (lack of oxygen) develops.
- The problem: in a soaking-wet substrate the roots drown. The fine root hairs die off, which paradoxically means the plant can no longer absorb water and nutrients. The plant shows symptoms that look like a lack of water (drooping leaves), so many beginners give even more water – a deadly vicious circle. In addition, constant wetness promotes root rot – often caused by Pythium, a fungus-like pathogen (oomycete).
- The solution: keep to a consistent wet-dry cycle. Water the pots thoroughly once (with about 10–20% runoff) and only water again when the top 3–5 cm of the substrate is completely dry. The simplest check: lift the pot. If it feels feather-light, it is time to water. If it is still heavy, wait. Use pots with enough drainage holes and lighten heavy soil with about 20–30% perlite. Explained in detail in: Watering plants properly.
3. Temperatures outside the metabolic optimum
Plants cannot actively regulate their body temperature. Their metabolism (enzyme activity, cell division, nutrient transport) is directly determined by the ambient temperature. If temperatures are outside the comfort range, the metabolism slows down sharply or stops completely.
- The problem:
- Too cold (below 18 °C): the chemical processes in the plant run in slow motion. The roots absorb phosphorus in particular less well; purple stems can indicate this (in some strains the colour is also genetic).
- Too warm (above 30 °C): evaporation through the leaves rises extremely. To avoid drying out, the plant closes its stomata. Photosynthesis stalls and growth freezes.
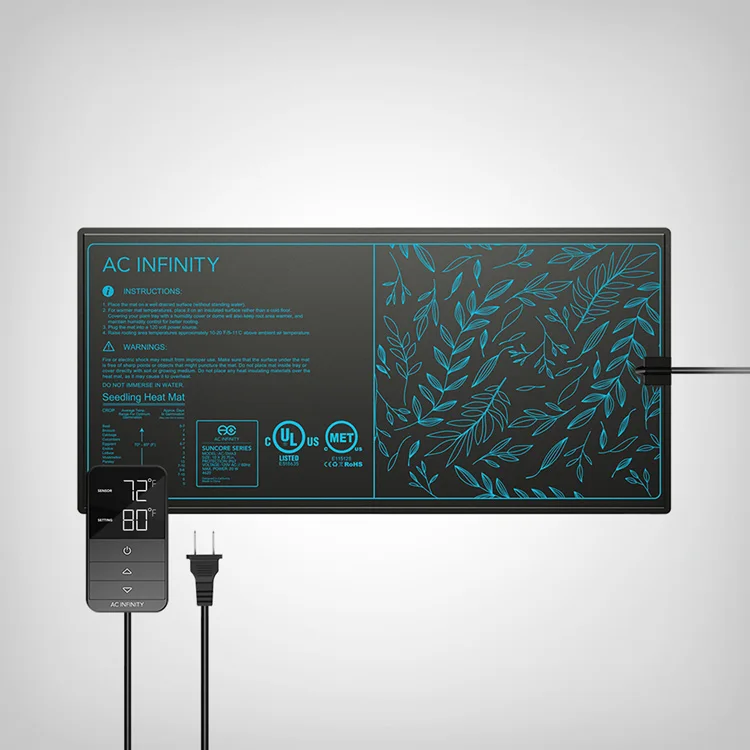
- The solution: measure the temperature directly at canopy level. The optimal range during the day is 22–26 °C (under LED light, due to the lack of infrared radiation, 26–28 °C is also fine). At night the temperature may drop by a maximum of 4–6 °C, but never below 16 °C. If necessary, use a heat mat for the root zone or optimise your extraction control.
4. Wrong pH of the nutrient solution (nutrient lockout)
You can give your plant the best nutrients in the world – if the pH in the substrate is wrong, the table is laid for the roots, but the door is locked. The pH determines how well the individual nutrient salts dissolve in water.
- The problem: if the pH deviates from the optimum, the nutrients form insoluble compounds (they precipitate) and the roots can no longer absorb them. This is called nutrient lockout. In soil the optimum for uptake is between 6.0 and 6.8. In coco it is around 5.8–6.2, in hydro systems around 5.5–6.2. You can read all the details in the pH guide. A wrong pH quickly leads to several deficiencies at the same time, even though there are enough nutrients in the pot.
- The solution: measure the pH of every nutrient solution before watering with a calibrated digital pH meter. Use good pH down (for example based on phosphoric acid) or pH up to adjust the value. If there are deviations, correct the pH of the substrate by flushing with pH-adjusted water.
5. Wrong nutrient dosage (too much or too little)
Seedlings are like babies – they cannot handle heavy food. In the first 10–14 days after germination, the seedling feeds itself on the nutrients stored in the seed. The first pair of leaves (seed leaves / cotyledons) serves as its own pantry.
- The problem:
- Too many nutrients (nutrient burn): many beginners put seedlings straight into heavily pre-fertilised potting soil or start with mineral nutrients from day one. The high salt concentration in the substrate draws water out of the sensitive baby roots via reverse osmosis. The root tips burn, the leaf edges turn brown and curl (clawing), and growth stops.
- Too few nutrients: on unfertilised substrates (such as coco, rockwool or seed and cutting compost) a real deficiency develops after about 10 days. The plant turns yellow from the bottom up because it moves mobile nutrients (such as nitrogen) to the new shoots.
- The solution: for the first two weeks, use only unfertilised seed and cutting compost or special light-mix soil. On coco/hydro, start with a very weak nutrient solution (EC: 0.4–0.6 mS/cm) as soon as the first serrated leaves appear. Increase the concentration only slowly and keep an eye on the leaf tips.
6. Root problems and unsuitable root space
What happens below ground directly determines what grows above ground. If the root zone is damaged or too cramped, the plant cannot put any energy into shoot growth.
- The problem:
- Circling roots / pot-bound: if a plant stays too long in a pot that is too small, the roots grow in a spiral along the pot walls. They become entangled, pinch off each other's supply lines and stop growing.
- Root rot (Pythium): lack of oxygen due to overwatering or substrate temperatures that are too high (above about 24 °C) lets pathogens such as Pythium multiply. The roots change colour from healthy white to slimy brown and smell musty.
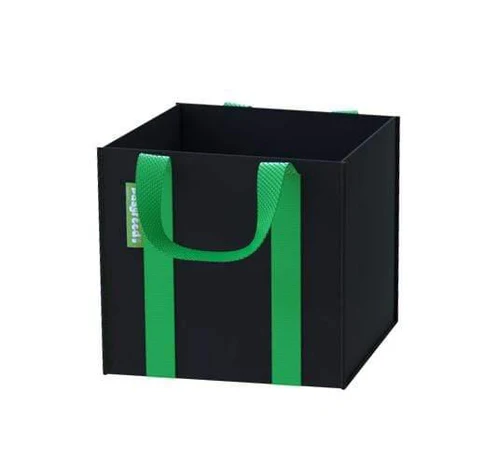
- The solution: repot young plants in good time, as soon as roots become visible at the drainage holes of the pot. Preferably use fabric pots (Easy Feed). They provide natural pruning of the root tips through contact with air (air pruning) and largely prevent circling roots. Beneficial microorganisms such as Trichoderma or mycorrhizae can strengthen the root zone further.
Handy against stagnation
Fabric pots for healthy roots, perlite for drainage, mycorrhizae for the root zone and a heat mat against cold feet.


Diagnostic scheme: how to find the fault
Use this systematic process of elimination to find the cause of the stagnation:
Step 1: check the moisture in the substrate
👉 Is the soil permanently wet and the pot very heavy?
❌ Yes: overwatering! Stop watering immediately and let the substrate dry out.
✅ No: go to step 2.
Step 2: check the pH value
👉 Was the pH of the nutrient solution measured and corrected before every watering?
❌ No: pH error very likely! Buy a pH meter, calibrate it and adjust the nutrient solution.
✅ Yes: go to step 3.
Step 3: check the light intensity (PPFD)
👉 Does the plant really get grow light, or is it stretching extremely thin upwards?
❌ It is stretching: lack of light! Hang the lamp closer or use a stronger lamp.
✅ No: go to step 4.
Step 4: measure the temperature
👉 Is the temperature at the canopy constantly below 18 °C or above 30 °C?
❌ Yes: temperature shock! Adjust heating or ventilation to reach 22–26 °C.
✅ No: check the roots for circling or lower the EC (nutrient concentration) of the solution.
Comparison table: optimal values vs. danger zones for young plants
| Parameter | Optimal range (seedling / young plant) | Danger zone | Typical symptoms of stagnation |
|---|---|---|---|
| Light (PPFD) | 100 – 300 µmol/m²/s | < 80 or > 500 µmol/m²/s | Stretching with too little light; bleaching of the growing tips with too much light. |
| Moisture in the substrate | Alternating (wet to dry) | Permanently saturated (no runoff) | Yellowish leaves, drooping, stalled root growth, rot. |
| Day temperature | 22 °C – 27 °C | < 16 °C or > 32 °C | Dark purple stems in the cold; heat stress and curled leaf edges in the heat. |
| pH value (soil) | 6,0 – 6,8 | < 5.5 or > 7.2 | Deficiency symptoms (e.g. rust spots due to calcium deficiency), blocked growth. |
| EC value (seedling) | 0.4 – 0.8 mS/cm | > 1.4 mS/cm | Burnt leaf tips, dark green claws, dried-out new growth. |
❓ FAQ: frequently asked questions about stunted growth
Q: How long does it take for a stagnating plant to recover?
A: That depends strongly on the cause and how severe the damage is. If you correct a pH error or a lighting problem, you often see new, healthy growth after just 3 to 5 days. With severe root damage from overwatering or root rot (Pythium), however, it can take 10 to 14 days, because the plant first has to grow new roots before it can grow above ground.
Q: Can I still save a plant with root rot?
A: Yes, at an early stage you can. Carefully take the plant out of the pot and rinse the old, wet soil off the roots. Cut away brown, slimy roots with disinfected scissors. Put the plant in fresh, well-aerated substrate (for example with plenty of perlite) and water with a mild nutrient solution to which you add beneficial fungi (such as Trichoderma) or an enzyme product that breaks down dead root mass.
Q: Does it make sense to use root stimulators for stagnation?
A: Yes, absolutely. Products such as humic acids, seaweed extract and mycorrhizal fungi strongly stimulate root growth and improve nutrient uptake. They can promote the formation of new roots and increase the effective root surface – but they do not repair dead tissue. Always use these stimulators strictly according to the dosage instructions and do not give the plant too much base nutrient (NPK).
Q: Which substrate is safest against stagnation for beginners?
A: Good, lightly pre-fertilised soil (light mix) from a specialist retailer is the safest choice. This soil is well aerated, holds water well without becoming saturated and, thanks to its natural buffering capacity, forgives small pH fluctuations much better than coco or pure hydro media.
Q: My seedling is stretching and about to fall over – what can I do?
A: Lower the lamp immediately or increase the intensity to stop the stretching. Support the thin stem carefully with a toothpick or a piece of wire. When you next repot, you can plant the long, stretched stem deep in the soil up to just below the seed leaves. The buried stem will form new roots underground.
Q: How often should I calibrate my pH meter?
A: For reliable measurements, calibrate a digital pH meter weekly in the first month and then at least once a month. Use special calibration solutions (pH 4.01 and pH 7.01) and never store the electrode dry, but always in KCl storage solution (see calibrating a pH meter).
Q: Is fresh tap water harmful to young cannabis plants?
A: Usually not. In the Netherlands tap water is normally not chlorinated, and in Germany it usually is not either, or only very lightly. Where chlorine is added, it evaporates if the water stands open for 24 hours – chloramine, on the other hand, does not; that can only be removed with a carbon filter or reverse osmosis. The hardness and pH of the water are usually more important. Water that has stood for a while is also at room temperature, which prevents temperature shock for the roots.